Polarimeter (Strain measuring equipment)
Glass and plastic materials play increasingly significant roles in industrial fields day after day. Since the characteristics of these materials are greatly affected by temporal environment and crystalline conditions, it is necessary to conduct qualitative and quantitative monitoring of strain-stress of individual materials to determine their shape and required atmosphere in laboratories and design sections, and to control its quality scientifically in production processes.
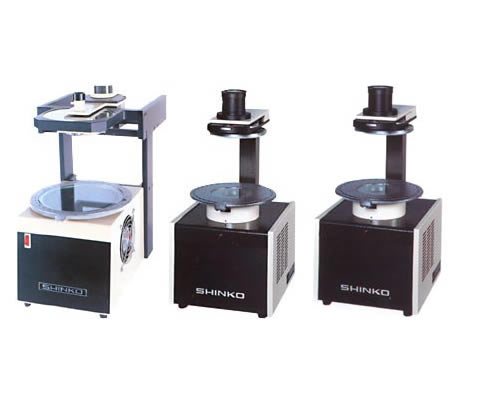
SHINKO SEIKI offers five types of polarimeters that enable measurement of strain-stress of transparent materials such as glass and plastics, which are widely used in industrial fields.
 Polarimeter (Strain measuring equipment)
 [Features]
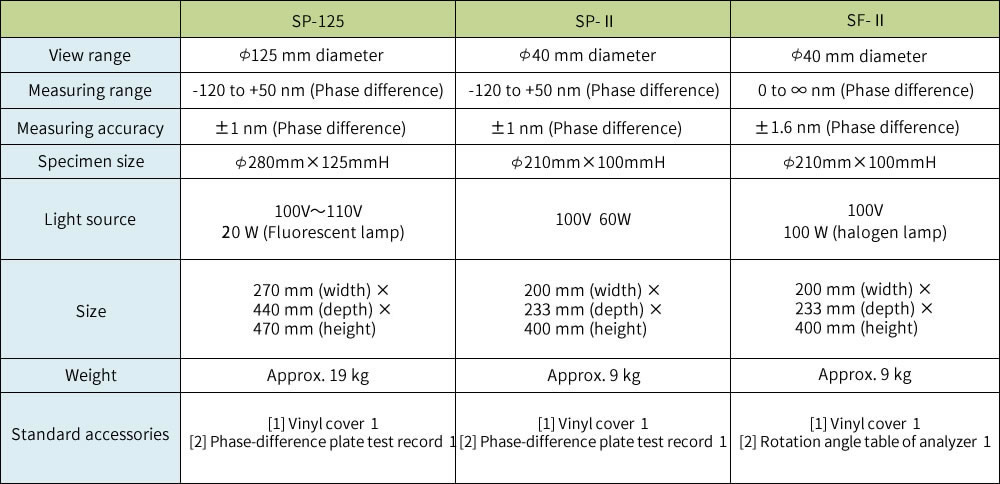
- The SP-125, SP-II and SF-II are small-sized, sturdy and portable, and ensure a sharp view and have sufficient accuracy for practical use. Measuring operations and other instrument handling procedures are extremely easy.
- The SP-125 and SP-II are equipped with a rotating phase-difference plate for phase difference measurements. It enables a wide measuring range when the standard phase-difference plate is used.
- The SF-II adopts the Senarmont method of phase-difference measurement, thus providing a wide measuring range that is particularly useful for measuring plastic materials with a high photoelastic constant.
[Optional accessories]
Camera mounting jig for oil bath photography
Specifications

SF-IIC, SF-IIL, SF-II ASSIST
 [Features]
- Measurement is automated via color image processing, thus reducing inconsistencies in measured results.
- Measurement data and image data are easily recorded.
- Glass strain can be observed using a sensitive color plate.
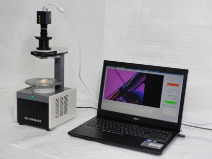
- The image on this page is the newly developed SF-II ASSIST.
- SF-II ASSIST (* optional accessory) can support measurement simply by installing in the existing SF-II. It increases the number of position that can be simultaneously processed to 10 points, which markedly shortens processing time . Also, SF-II ASSIST can automatically create test reports once measurement data has been saved.
- The test reports can be edited anytime with Microsoft® Word software.
* SF-II ASSIST does not come with the SF-II unit. In addition to the software, a CCD camera, image capturing lens and PC are required to use SF-II ASSIST.
[Specifications]
- Measurement method: Senarmont method
- Measurement accuracy: 1.6 nm (Double refraction)
- Measurement range: 590 nm in primary interference
- Measurement view range: φ40 mm
- Camera view range: 2×, 4×, close-up mode
- Light source: 15 V, 150 W • halogen lamp (SF-IIC), 24 V, 48 W – LED (SF-IIL)

